Web accessibility is the practice of making web content more accessible to a wide range of people with disabilities. By following accessibility standards, we can ensure the Reed College website is inclusive of everyone, including, but not limited to, people with
- visual impairments or low vision;
- cognitive or neurological disabilities, including dyslexia and attention deficit disorder;
- motor disabilities that may prevent the use of a mouse or other common input devices;
- auditory disabilities.
Accessible web content promotes equality and usability for our audiences. Not only is it the right thing to do—it is required by law for colleges and universities that receive federal financial aid.
While it may not be possible to anticipate and accommodate all types, degrees, and combinations of disability, there are a few simple things you as a content editor can do to help ensure that your web pages are broadly accessible.
quick reference
How do I create accessible content?
As a Reed content editor, there are three things you must do to meet accessibility requirements.
- Use headings to clearly identify the sections and subsections of your page. Headings help sighted users visually scan the page. They help people with visual impairments find and navigate to content on the page. There are six "levels” of headings that should be used in numerical order to create a hierarchy of sections and subsections.
- Write informative link text. When linking to more content, do not use generic phrases like "click here."
Wrong: "To meet our staff, click here."
Right: "Meet our staff." - Describe images with "alt text" to convey the content and meaning of an image to a visually impaired user.
See below for information about implementing these best practices using Cascade CMS.
Use Headings
Use headings (such as the one above this paragraph) to clearly identify the sections of your page. Headings help sighted users visually scan the page. They help people with visual impairments find and navigate to content on the page. All users benefit from headings that break up large amounts of text into more digestible chunks.
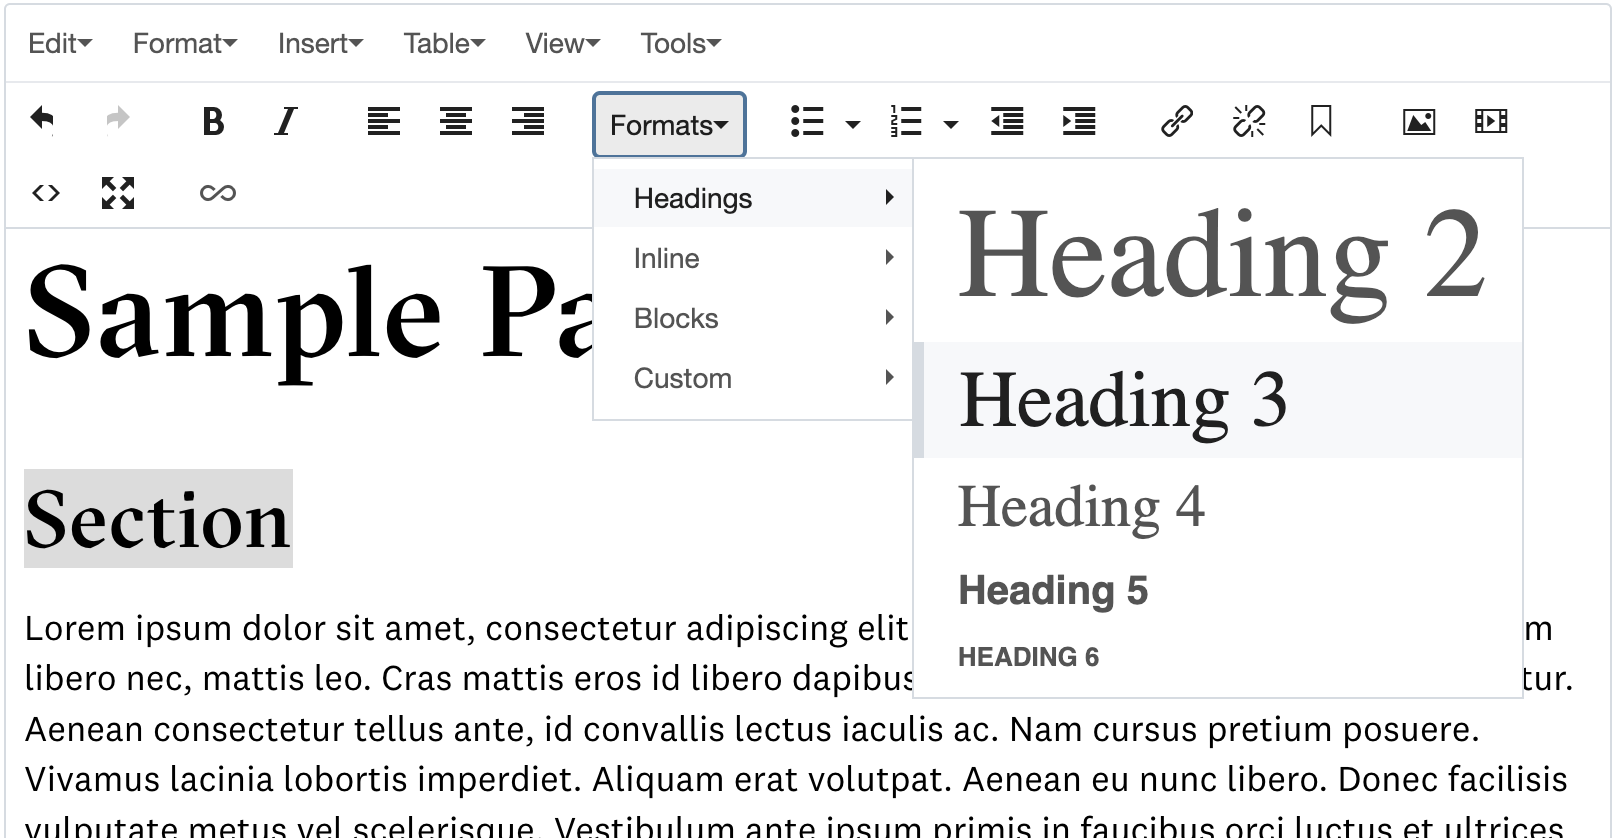
There are six "levels” of headings that should be used in numerical order to create a hierarchy of sections and subsections. Heading 1 is the top level and is reserved for the page title (e.g. "Accessibility Best Practices''). Headings 2 through 6 are available for use in page content. A typical page's headings, were they represented as an outline, should look like this:
- Page Title (Heading 1)
- Section (Heading 2)
- Sub-section (Heading 3)
- Sub-section (Heading 3)
- Section (Heading 2)
- Sub-section (Heading 3)
- Section (Heading 2)
Each heading has a unique typographical format. Use the Formats menu to select an appropriate heading format. Always choose the heading level that is appropriate for its place in the hierarchy. Do not choose one based on the typographical format you prefer.
To create a heading, select a line of text, then click Formats > Headings, then choose the appropriate heading level.
Another way to create a heading is to use a Heading component, which offers some advanced options like adding a call-to-action button. View the Heading component page for more information.
Write Informative Link Text
Use informative phrases for link text. Do not use generic phrases like "click here." Visually impaired users often navigate a website by having just the links read out to them. Other users often visually scan the page for links. In both cases, the context of the surrounding text is lost.
Wrong: "To meet our staff, click here."
Right: "Meet our staff."
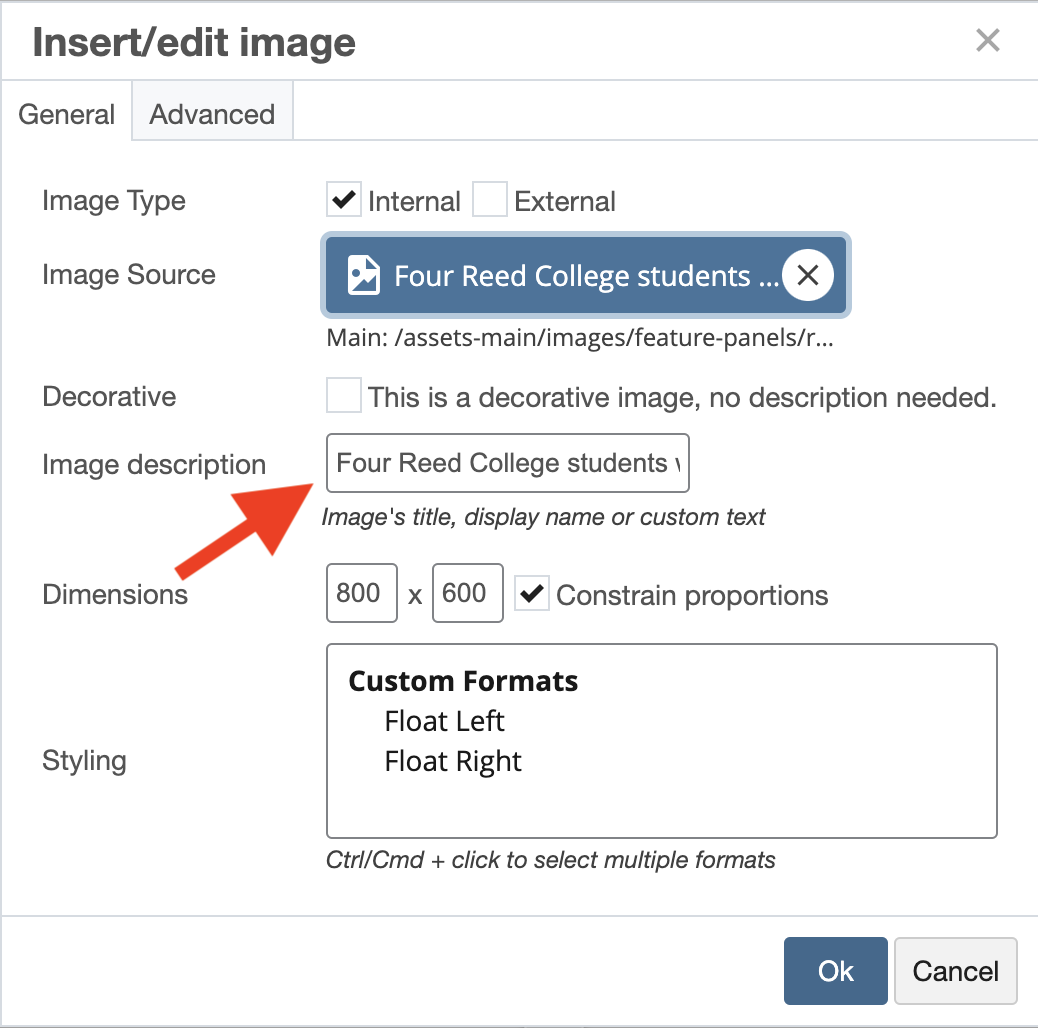
Use Alt Text to Describe Images
An image description (sometimes called “alt text”) conveys the content and meaning of an image to a visually impaired user. When writing a description, create a rich mental picture by including details of what you see. If there are people, how many? What are they doing? What are they wearing? Are they laughing? Lounging? Be as descriptive as you can in one sentence. Descriptions should be shorter than 155 characters.

Avoid Images of Text
Avoid using infographics or other images that include text. Assistive technologies cannot “read” these images, so the information they convey to a sighted user will be invisible to a visually impaired user. If you must use an image that contains text, be sure to accurately describe its meaning using alt text (see above) or through other page content immediately below the image.
How to Add Alt Text
Add an image description to an image through the Insert/edit Image button and dialog box.